How To: Make An Upcycled Crochet Rug
Welcome Morgan of King Soleil! Enjoy her free step-by-step tutorial for making an Upcycled Crochet Rug. Thank you Morgan!
Step-by-Step Upcycled Crochet Rug Tutorial
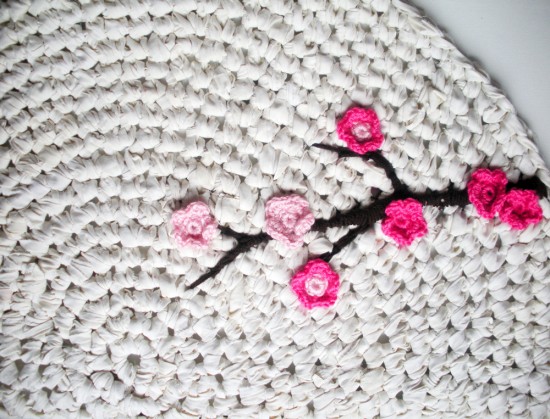
There is something so completely satisfying when you are able to create a piece for your home that is functional, cozy, and perfectly your style. All the more rewarding when you are eco-friendly, making the world a greener place, and adding that handmade flair to your everyday. I am thrilled to be a guest blogger at Upcycle Magazine, a site utterly devoted to this very endeavor.
As the owner of King Soleil, I am always experimenting, altering, and creating, whether using crochet hooks, needle and thread, or embroidery floss. I am most passionate, however, about upcycling. If you are as big of a fan as I am of Upcycle Magazine, you are well aware of the theory behind this term, but if you are new to this concept, upcycling is when you take a previously discarded product and create something different, improved, than what it was before. Not only are you being green, you are actually increasing the value and aesthetics of what would become, in most cases, landfill additions.
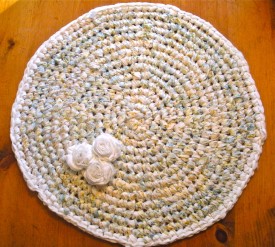
In this tutorial, you will learn how to take fabric and transform them into rugs using nothing more than a huge crochet hook and scissors. The rugs can be as big as the amount of fabric you have (the more fabric you use, the bigger the rug, and the greener you are!), and suite any style; modern, vintage, whimsical, nautical, it is truly up to you and your imagination where it takes you.
The only crochet skills you will need are how to make a skip knot (tying the fabric to your hook to begin), a chain (creating a ‘braid’), a slip stitch (pulling your hook through the stitch to join), and a single crochet (sc, the basic stitch in crochet). For those of you who do not crochet, these are the ultimate basics of crochet, and after a little research, I am sure you can master these with a bit of practice.
I sometimes receive questions regarding the fabric ‘yarn’ used to make the rugs. You can honestly use whatever fabric you have on hand, or find in your local Goodwill, thrift store, yard sale. The bigger the piece, the easier to work with. My favorite finds are duvet covers, any size sheet, and curtains. However, I have used anything from jeans, to left-over fabric scarps. After cutting off any buttons, hooks, etc., you simply cut (or tear) strips based on how thick you would like your rug. A good base is 1.5 inch strips. I am honestly not sure what size my crochet hook is (it was a gift with no size on it), but it’s the biggest one I have seen! I like chunky stitches in my rugs, but if you would like more delicate stitches, go for a slightly smaller hook and thinner strips.
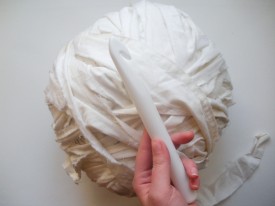
Tie all the strips together and roll into a crazy huge ball. If it gets a bit cumbersome, cut the strip and start a new ball. If you want to be spiffy, use different colors! You can keep the colors separate, adding new fabric as you go along, or tie the colored strips together in one ball and begin!
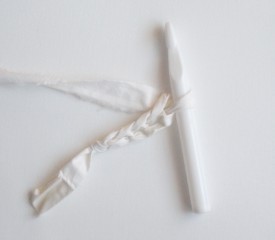
So you have your enormous fabric yarn ball and your super-size crochet hook. Stretch out those biceps, as they will get quite a work out, and make your slip knot. Chain 4 create your ‘braid’.
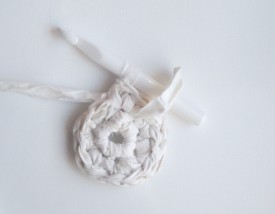
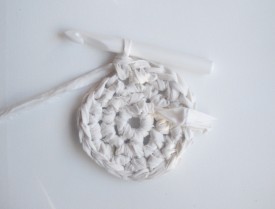
Slip stitch into the first chain to create a circle. Chain 1. For Round 1, you are now going to single crochet (sc) into the circle six times (6sc). To do this, you put your hook into the circle, yarn over, pull your hook back through the circle and above the chain, and complete your sc. You can use a stitch marker here so you know when you have completed a round, but as you will see in the pictures, I pull the tail through the circle and use that as my marker. As I increase rounds I usually just tie a piece of the fabric and move it up as I go.
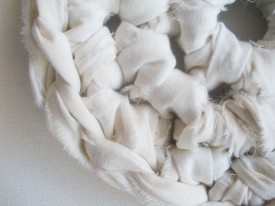
Now you are going to start crocheting in the round. Note in this picture you see the tail sticking up. It is important to have a marker so you know when you complete a round (more on this later). By crocheting in the round, I mean increasing stitches in each round to make a flat circle. If you do not increase your rounds you will end up with a basket (equally as functional and cool as a matter of fact!) but for a rug, you want this totally flat so no one trips over raised edges. For Round 2, you are going to single crochet twice into each stitch from the previous round. To do this, you simply single crochet, reinsert your hook into the same stitch and single crochet again. Easy peasy! (2 sc in every st).
Round 3, 2sc in the next stitch, 1sc in the next, and continue alternating between 2 sc and 1 sc until you complete your round. Don’t worry if your rug looks a bit more like a shallow bowl than a coaster at this point. It should flatten out in the next round.
Round 4, 2sc in the next stitch, sc in the next 2 stitches. Continue around, 2sc, sc, sc.
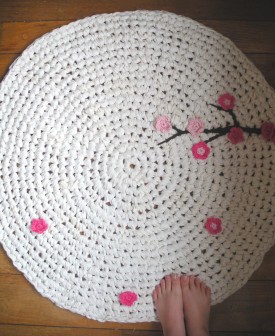
Round 5, 2sc, sc, sc, sc, 2sc. See the pattern? You are adding a sc in between each 2sc with each round. For the cherry tree rug, I ended with 21 sc in between each 2sc. The rug has a 37inch diameter. That’s it! You keep going around and around and around alternating until you have a diameter you are happy with, run out of fabric, or get an arm cramp.
A tip: Ever see crochet rugs that look crooked, or wonky? That’s because the maker didn’t finish the round before changing the number of stitches. Once you commit yourself to a round, let’s say, a round with 5 sc in between each 2sc, and your rug starts to get wavy, for example, don’t increase your round to 6sc or 7sc in between each 2sc until you complete your round. Once you complete each round, take a step back and look at your rug. Is it wavy? Does it look like a bowl? Alter your stitches accordingly in the next round. My first few rugs were totally off center and it is because I would panic and change up my stitches whenever the rug got wonky.
This stays true for changing colors if you want them concentric. Wait until you finish the round before adding a new color. However, if you change your colors frequently, or want a ‘striped’ effect, add new colors constantly, regardless of your round. But be careful not to confuse your new color with a new round! Tricky!
It took me A LOT of rugs before I was able to crochet in the round for the whole rug. Before that I was constantly adjusting the number of stitches. Here are some troubleshooting tips for those of us who need practice to make perfect. If your rug is wavy, this means you have too many stitches and the extra fabric is making it buckle. To
fix this, look at your rug: does it look like a bay on a breezy day, or the North Shore of Hawaii during surfing season? If it is slightly wavy like a bay, increase your sc in the next round. For example, let’s say you have 5 sc in between your 2sc. For your next round, increase to 7 sc instead of increasing to 6 sc in between your 2sc. Your rug should flatten.
If your rug looks like open Pacific Ocean waves, sc around without any 2sc. Still wavy? Try skipping a stitch (sk st) or stitch two stitches together (st2tog). To sk st, literally skip a stitch between your sc. To s2tog, insert your hook into the stitch, yarn over, and pull back through the stitch. But instead of finishing the sc, insert your hook into the next stitch, yarn over, pull through, and then finish your stitch through both stitches. This will squish both stitches together without leaving a little gap like the sk st does. However, with these rugs, you really don’t notice a few sk st. Do what you feel most comfortable with.
Your rug looking more like a bowl? That is because you have too few stitches and the sides are pulling up. This fix is simple: decrease the number of sc between your 2sc. For example, if you have 5 sc in between each 2sc, decrease to 4 sc in between your 2sc. The more 2sc you have in your round the more stitches you have. If you could put an apple in there and it won’t roll out, try 2sc in each stitch. It takes practice to troubleshoot and each rug will be different. Do your best and power through! Don’t become discouraged and rip out all your stitches, squinting through frustrated tears like I did. Your first rug (s) may not lay totally flat or be a bit off center, but that’s ok!
As simple as this project is, don’t expect your first rug to be a prize winner, but be sure to be just as proud! I feel like a sniper when I make these rugs, adjusting not for humidity, air temperature, and wind, but for fabric weight, strip width, and hook size. It takes practice, but in no time you will hit your mark! (no pun intended…well, maybe a little..)
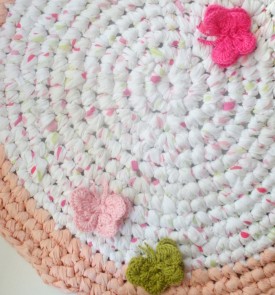
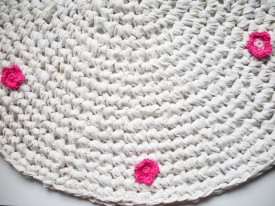
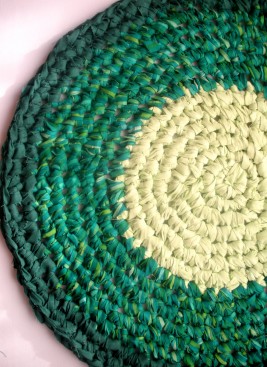
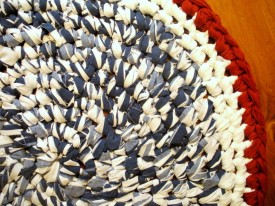
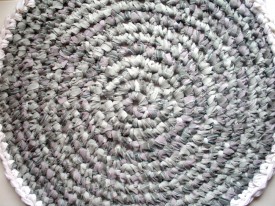
Once you are confident in your rugs, try embellishments! Appliqués, fabric scrap rolled roses, yarn embroidery, the possibilities are endless, and this is where you can cater the design to suite your esthetic. Here are some examples for inspiration!
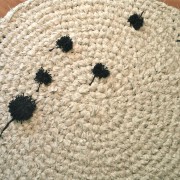
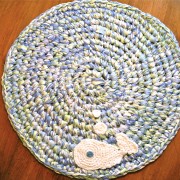
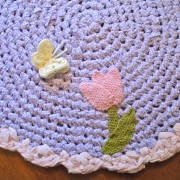
Ta-da! Hooray for upcycling, crocheting, your imagination, and your wonderful eco conscious creation!
Visit me at www.kingsoleil.com
Shop for these rugs and more at my Etsy Shop.
And thank you Upcycle Magazine for spreading the upcycling love!


Love your embellishments to the rag rugs. Can I ask do you slip stitch or chain one when you move onto next round? Or do you get to your marker and just 2sc into the first stitch of previous round?
Hi Melissa, This great tutorial was written by our friend Morgan over at King Soleil. She is the expert on this project, you can contact her here http://www.kingsoleil.com/Contact.html with your questions. thank you! Jill
Sometimes it is fun to throw a bunch of colors in a black garbage bag and when you get to the end of your ball reach in without looking and use the next ball you grab. Totally random and fun!
Thank you for posting these instructions!! I recently made new drapes for my living room and didn’t know what to do with the old ones. I used the zig-zag stitch to connect my strips. It took a long time, but decreases the bulk. I’m a long way from finished, but so far so good.
hi, just wondering how you made the cherry tree branch?
Marissa
Hi Marissa,
Great question. This popular tutorial was written by our friend Morgan over at King Soleil. Here is a link to her contact form. http://www.kingsoleil.com/Contact.html You may direct any questions to her there and mention that you are coming from the tutorial at Upcycle Magazine.
Thank you
Jill
Thank you so much for your helpful notes!!! I really love your work!
This is the best tutorial I have found yet. I was trying to make a rug using other instructions , and kept getting frustrated and taking it out because they did not give detailed instructions on when to increase the stitches.I am using old tee-shirts, it is a little bit of challenge because they stretch, but I made a tee-shirt quilt and do not want to waste the rest of the tee-shirt.
Amazing post! So much great info on making rag rugs. I’ve been eyeing up the white rug with pink flowers since I spied it on Pinterest months ago, and I’m using it as inspirations for my next crochet project on my blog. Thanks your sharing your tips!
These are good instructions and the easiest to understand that I have found. You mentioned tying fabrics together, but I wonder if making the vertical slits and joining fabric will work okay? I’ve made a toothbrush rag rug and joined fabric that way, but the center is wavy because of not increasing stitches correctly. My next rug will be tshirts or cotton crocheted with your directions.
Leave your response!
Follow us on facebook!
Recent Posts
Most Commented
Most Viewed